Data Version Control from Zero to One
The name of this article is inspired by the book Zero to One by Peter Thiel, which describes the process of creating something radically new and taking it to the first step “0 to 1” (or intensive growth). The phrase is used in contrast to the term “1 to n” (or extensive growth) that means creating incremental improvements to what is already familiar.
Objective
The goal of this article (Zero to One) is to give you some hands-on experience with a basic machine learning version control scenario, managing data, model and ML codes using DVC and Git.
Context and challenge
Let’s take a look at an example. Suppose we have the following project structure:
── README.md
├── data
│   ├── data_raw.csv
│   ├── data_processed.csv
│   ├── data_train.csv
│   └── data_test.csv
├── models
│   ├── model.pkl
│   ├── model_CNN.pkl
│   └── model_xgboost.pkl
├── model.py
├── params.yaml
├── test.py
├── train.py
└── utils.py
Everything appears to be in order. However, after a few iterations, your directory may resemble to this:
── README.md
├── data
│   ├── data_raw.csv
│   ├── data_processed.csv
│   ├── data_processed_v1.0.csv
│   ├── data_processed_v1.1.csv
│   ├── data_train_v1.0.csv
│   ├── data_train_v1.1.csv
│   ├── data_test_v1.0.csv
│   └── data_test_v1.1.csv
├── models
│   ├── best_parameters_model.pkl
│   ├── model_v1.0.pkl
│   ├── model_v2.0.pkl
│   ├── model_CNN_v1.0.pkl
│   ├── model_xgboost_v1.0.pkl
│   ├── model_xgboost_v1.1.pkl
│   └── model_xgboost_v2.0.pkl
├── model.py
├── params.yaml
├── test.py
├── train.py
└── utils.py
Even if you prefer to work with organized chaos, any additional team members will likely have no clue which model has been trained when, on which set of parameters, which version of data, and so on. It’s a mess and we could use some help. Let’s start with the easiest way to utilize DVC.
Broadly speaking, DVC (Data Version Control) acts as a layer over git which produces versioned pointers to the files instead of the files themselves. These files are finally stored in a local cache and this cache can be synchronized with a remote storage.

Under the hood, DVC hashes the file data.csv, adds it to .gitignore and creates a small file data.csv.dvc that is added to Git. By comparing hashes, DVC knows when files change and which version to restore.
Setup of Git and initialize DVC
Step 1: Create a code repository in github, gitlab or any specific hosting platform.
Step 2: In your preferred python environment, install dvc with s3 object storage dependencies.
$ pip install dvc[s3]Step 3: Cloning your repository, and locate yourself into it.
$ git clone https://github.com/benouinirachid/dvc_tutorial.git
Cloning into 'dvc_tutorial'...
remote: Enumerating objects: 5, done.
remote: Counting objects: 100% (5/5), done.
remote: Compressing objects: 100% (5/5), done.
remote: Total 5 (delta 0), reused 0 (delta 0), pack-reused 0
Receiving objects: 100% (5/5), 13.50 KiB | 1.50 MiB/s, done.

$ cd dvc_tutorial
Step 4: Let’s begin by initializing our data version control.
$ dvc init
Initialized DVC repository.You can now commit the changes to git.+------------------------------------------------------------------+
|                                                                  |
|     DVC has enabled anonymous aggregate usage analytics.         |
|  Read the analytics documentation (and how to opt-out) here:     |
|          <https://dvc.org/doc/user-guide/analytics>              |
|                                                                  |
+------------------------------------------------------------------+What's next?
------------
- Check out the documentation: <https://dvc.org/doc>
- Get help and share ideas: <https://dvc.org/chat>
- Star us on GitHub: <https://github.com/iterative/dvc>
You can use git status to see the different files created by dvc.
Step 5: It is important to commit the files created by dvc init.
$ git add .
$ git commit -m "initialize dvc"
[main 1c83a39] initialize dvc
 9 files changed, 515 insertions(+)
 create mode 100644 .dvc/.gitignore
 create mode 100644 .dvc/config
 create mode 100644 .dvc/plots/confusion.json
 create mode 100644 .dvc/plots/confusion_normalized.json
 create mode 100644 .dvc/plots/linear.json
 create mode 100644 .dvc/plots/scatter.json
 create mode 100644 .dvc/plots/simple.json
 create mode 100644 .dvc/plots/smooth.json
 create mode 100644 .dvcignore
Setup of DVC Remote Storage
If you already have a remote storage service, you can skip the following and go to “Step 1”.
Here is an easy way to create a S3 Object Storage by using Minio. Follow the steps described in the link https://min.io/download .
For this tutorial, I recommend for you to install Minio server locally.
Example for Minio’ Windows Installation (use Power Shell):
PS> cd C:
PS> mkdir minio
PS> cd minio
PS> mkdir data
PS> wget https://dl.min.io/server/minio/release/windows-amd64/minio.exe
PS> setx MINIO_ROOT_USER admin
PS> setx MINIO_ROOT_PASSWORD password
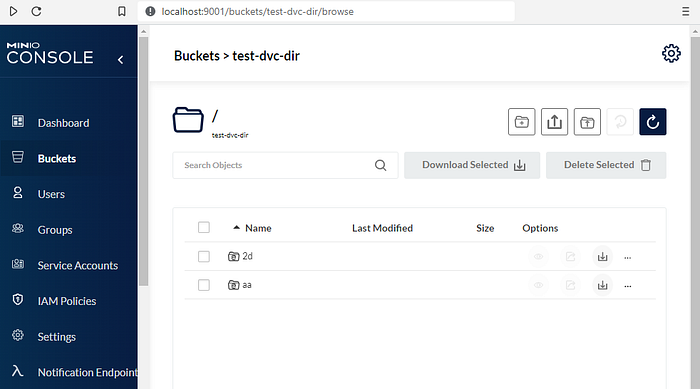
PS> C:\minio\minio.exe server C:\minio\data --console-address ":9001"Now, Minio server is running. You can visit localhost:9001 and create your bucket.
By running minio server it will use the port 9001 for minio server, and the port 9000 the S3 API.
For object storage that supports an S3-compatible API (e.g. Minio, DigitalOcean Spaces, IBM Cloud Object Storage etc.), configure the endpointurl parameter.
Step 1: Add the storage bucket.
$ dvc remote add -d s3-data-storage s3://test-dvc-dir/
Setting 's3-data-storage' as a default remote.
Step 2: Add the storage server end point.
$ dvc remote modify s3-data-storage endpointurl http://localhost:9000<!> The option -d is used to specify that s3-data-storage it will be the default storage.
Step 3: Then, configure the remote storage access credentials, access_key_id and secret_access_key parameters.
$ dvc remote modify --local s3-data-storage access_key_id minioadmin
$ dvc remote modify --local s3-data-storage secret_access_key minioadmin
The access_key_id and secret_access_key are defined respectively by minioadmin and minioadmin for Minio object storage.
<!> For values that contain sensitive user info, like access_key_id and secret_access_key, add them with the - -local option, so they’re written to a Git-ignored config file.
Step 5: It is important to commit the files created by dvc init.
$ git add .
$ git commit -m "setup of dvc remote storage"
[main 4acd2e0] setup of dvc remote storage
 1 file changed, 5 insertions(+)
Add Data and Code
Step 1: Create the project structure.
mkdir data
mkdir models
mkdir data/raw
mkdir data/processed
mkdir data/prepared
Step 2: Now, we will download some ready-to-use python script for machine learning, from repository https://github.com/benouinirachid/ml_scripts .
wget -O load_data.py https://raw.githubusercontent.com/benouinirachid/ml_scripts/main/load_data.py
wget -O prepare_data.py https://raw.githubusercontent.com/benouinirachid/ml_scripts/main/prepare_data.py
wget -O process_data.py https://raw.githubusercontent.com/benouinirachid/ml_scripts/main/process_data.py
Step 2: We will need to load our dataset file from a data source using the script load_data.py .
$ python load_data.py -p data/raw -u http://archive.ics.uci.edu/ml/machine-learning-databases/wine-quality/winequality-red.csv
#INFO: Data is succefully loaded!
<!> This script will download a data file named winequality-red.csv to the directory data/raw .
Start tracking data with DVC
Step 1: Let’s continue by adding the data directory to dvc.
$ dvc add data
100% Adding...|███████████████████████████████████████████████████|1/1 [00:00,  1.55file/s]To track the changes with git, run:        git add data.dvc .gitignore
DVC will guide you through how to add tracking of files in Git. Instead of adding the whole data directory to the repository, you only add the data.dvc file. You can check that data directory has been added to .gitignore.
Step 2: In a general way, you can run git add . to add all the changed files which are not tracked by dvc.
$ git add .
$ git status
On branch main
Your branch is ahead of 'origin/main' by 2 commits.
  (use "git push" to publish your local commits)

Changes to be committed:
  (use "git restore --staged <file>..." to unstage)
        modified:   .gitignore
        new file:   data.dvc
        new file:   load_data.py
        new file:   prepare_data.py
        new file:   process_data.py
Step 3: To view changes on data you can use dvc status.
$ dvc status
Data and pipelines are up to date.
Step 4: Let’s commit the changes and
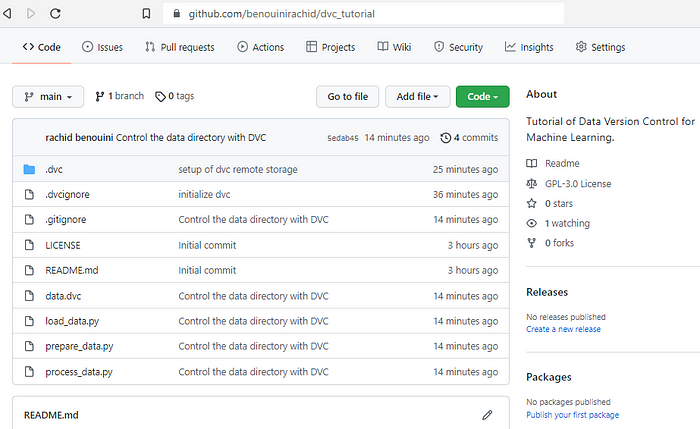
$ git commit -m "Control the data directory with DVC"
[main 5edab45] Control the data directory with DVC
 5 files changed, 109 insertions(+)
 create mode 100644 data.dvc
 create mode 100644 load_data.py
 create mode 100644 prepare_data.py
 create mode 100644 process_data.py
<!> You can recall that we only commit the changes on data.dvc file and not the actual data files.
Step 6: Now, we push code and data to the remote.
$ git push
Enumerating objects: 26, done.
Counting objects: 100% (26/26), done.
Delta compression using up to 8 threads
Compressing objects: 100% (22/22), done.
Writing objects: 100% (24/24), 4.64 KiB | 527.00 KiB/s, done.
Total 24 (delta 8), reused 0 (delta 0), pack-reused 0
remote: Resolving deltas: 100% (8/8), completed with 1 local object.
To https://github.com/benouinirachid/dvc_tutorial.git
   ea10895..5edab45  main -> main
Step 7: Finally, let’s push push our data to the remote storage.
$ dvc push
2 files pushed
Congratulations! Your code and data are now versioned in the repository.
You can verify on your minio server that some new objects are stored in the corresponding buckets.
Also, you can verify on your github repository that you have only pushed code files and .dvc.
Perform modifications on data
In the following we will perform some modification on data directory, and add new data files.
Step 1: Let’s process our data.
$ python process_data.py -i data/raw/winequality-red.csv -o data/processed/winequality-red.csv
#INFO: Data is succefully processed!
Step 2: check the status of data and code by:
$ git status
On branch main
Your branch is up to date with 'origin/main'.nothing to commit, working tree clean$ dvc status
data.dvc:
        changed outs:
                modified:           data
<!> You can see that the data changes are only tracked with dvc.
Step 3: Let’s add our data to dvc.
$ dvc add data
100% Adding...|███████████████████████████████████████████████████|1/1 [00:00,  2.95file/s]

To track the changes with git, run:

        git add data.dvc
Step 4:
$ git add .Step 5:
$ git commit -m "data has been processed"
[main 006236a] data changed, data has been processed
 1 file changed, 3 insertions(+), 3 deletions(-)
Step 6:
$ git push
Enumerating objects: 5, done.
Counting objects: 100% (5/5), done.
Delta compression using up to 8 threads
Compressing objects: 100% (3/3), done.
Writing objects: 100% (3/3), 358 bytes | 358.00 KiB/s, done.
Total 3 (delta 1), reused 0 (delta 0), pack-reused 0
remote: Resolving deltas: 100% (1/1), completed with 1 local object.
To https://github.com/benouinirachid/dvc_tutorial.git
   5edab45..006236a  main -> main
Step 7:
$ dvc push
2 files pushed
You can check again on your remote storage, that new files are stored in the corresponding bucket.

Congratulations! Your are in the road to master data versioning.
<!> Rule 1 — If you change data, just run:
dvc add data
git add data.dvc
git commit -m "New data added, or any specific message"
git push
dvc push
DVC and branches
In our scenario, we will use different git branches to manage data, for example use a branch named develop to perform some experiment on data.
Step 1: create a new git develop branch.
$ git checkout -b develop
Switched to a new branch 'develop'
Step 2: Run the following to change the dvc branch.
$ dvc checkout <!> Rule 2 — If you change the git branch (i.e. git checkout …), just run:
dvc checkoutStep 3: Update data by using prepare_data.py script, which will produce the train and test sets on data/prepared/
$ python prepare_data.py -i data/processed/winequality-red.csv -p data/prepared/
#INFO: Data is succefully prepared!
This will produce the following:
$ ls data/prepared
Mode                 LastWriteTime         Length Name
----                 -------------         ------ ----
-a----        12/27/2021   4:20 PM          74893 test_winequality-red.csv
-a----        12/27/2021   4:20 PM          18853 train_winequality-red.csv
Step 4: Since we changed the data, and by following Rule 1 ✔ we will need to add the data and push our code and data again (if there are no other data modifications still need to be done).
dvc add data
git add .
git commit -m "train and test sets hase been added."
Then,
$ git push -u origin develop
Enumerating objects: 5, done.
Counting objects: 100% (5/5), done.
Delta compression using up to 8 threads
Compressing objects: 100% (3/3), done.
Writing objects: 100% (3/3), 355 bytes | 355.00 KiB/s, done.
Total 3 (delta 1), reused 0 (delta 0), pack-reused 0
remote: Resolving deltas: 100% (1/1), completed with 1 local object.
remote:
remote: Create a pull request for 'develop' on GitHub by visiting:
remote:      https://github.com/benouinirachid/dvc_tutorial/pull/new/develop
remote:
To https://github.com/benouinirachid/dvc_tutorial.git
 * [new branch]      develop -> develop
Branch 'develop' set up to track remote branch 'develop' from 'origin'.$ dvc push
3 files pushed
<!> It is important to note, that I added -u or - - set-upstream since the branch develop has not been published yet on the remote.
Step 5 (Optional): print the tree of files in data directory on the develop branch.
$ tree data /f
├───prepared
│       test_winequality-red.csv
│       train_winequality-red.csv
│
├───processed
│       winequality-red.csv
│
└───raw
        winequality-red.csv
Now, Let’s get back to our main branch.
Step 6: By following Rule 2 ✔, will need to run both git checkout and dvc checkout.
$ git checkout main
Switched to branch 'main'
Your branch is up to date with 'origin/main'.

$ dvc checkout
M       data\
The output “M data\” , means there is a difference on the data between the branches main and develop.
Step 7 (Optional): print the tree of files in data directory on the main branch.
$ tree data /f
├───prepared
├───processed
│       winequality-red.csv
│
└───raw
        winequality-red.csv
We can recall her, that we have recovered only the files that, we create have on the main branch.
Congratulations! Your are able to manage your git branches on dvc.
Exercise:
By using the script train.py from the ml_scripts repository, and the models directory to save model, try to version and manage ML models using DVC, on a new branch feature-train-model.
To download the train.py script, use the following:
wget -O train.py https://raw.githubusercontent.com/benouinirachid/ml_scripts/main/train.pyTo train the model use:
python train.py -i data/prepared/train_winequality-red.csv -m models/elastic_net.pklReferences
https://dvc.org/doc/command-reference
https://appsilon.com/ml-data-versioning-with-dvc/
http://handbook.datalad.org/en/latest/beyond_basics/101-168-dvc.html